


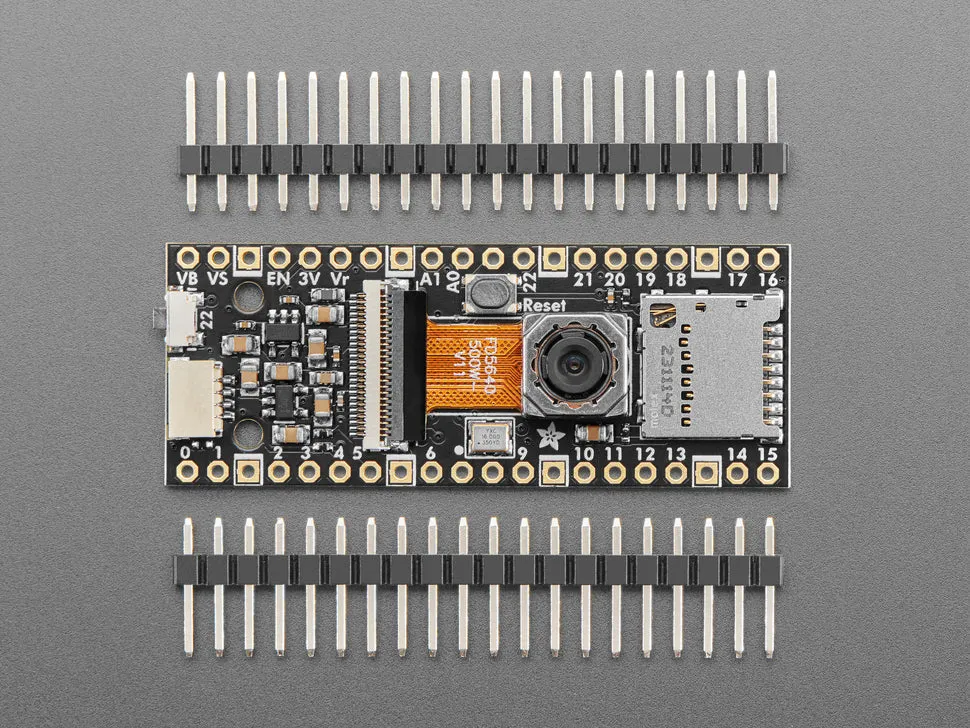
Listen closely, you can hear the PiCowbell ringing, informing you that the recently restocked Adafruit PiCowbell OV5640 Camera Breakout now features a 120-degree lens with autofocus capabilities.
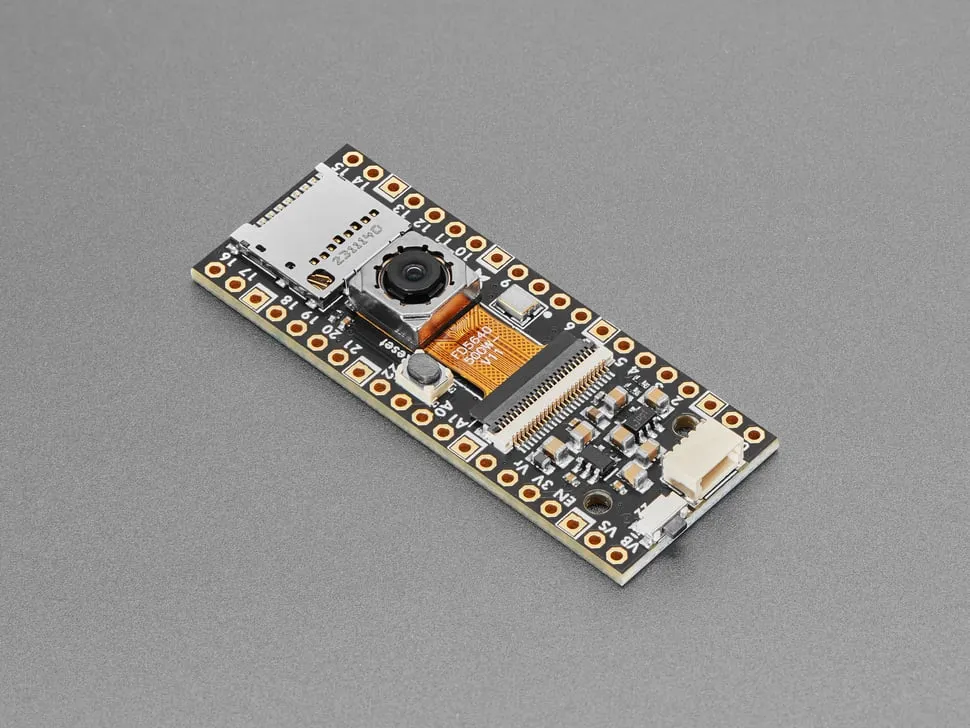
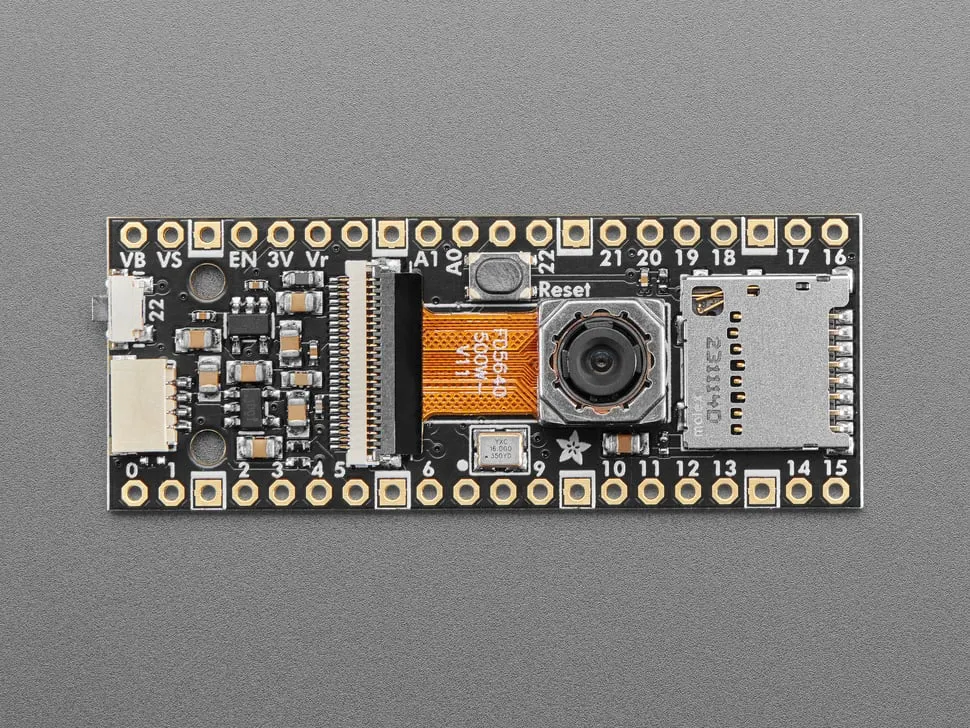
This camera boasts an OV5640 sensor with impressive 5 Megapixel quality, a 120-degree wide-angle lens with slight distortion, and an autofocus motor. It also includes all necessary support circuitry for capturing images with your Pico or Pico W. Whether for image analysis or saving to an SD card or adafruit.io, you can easily obtain raw RGB images or use the built-in JPEG encoding.
The RP2040 chip features a high-speed PIO interface and ample memory for connecting to 'DVP' (8-bit parallel digital) cameras. These camera sensors require 8 image data pins, Pixel Clock, H Sync and V Sync signals, as well as an I2C configuration interface, a Reset pin, and a power Down pin. This results in a significant use of GPIO, though there are still 6 pins remaining for additional functions like an SD card and shutter button.
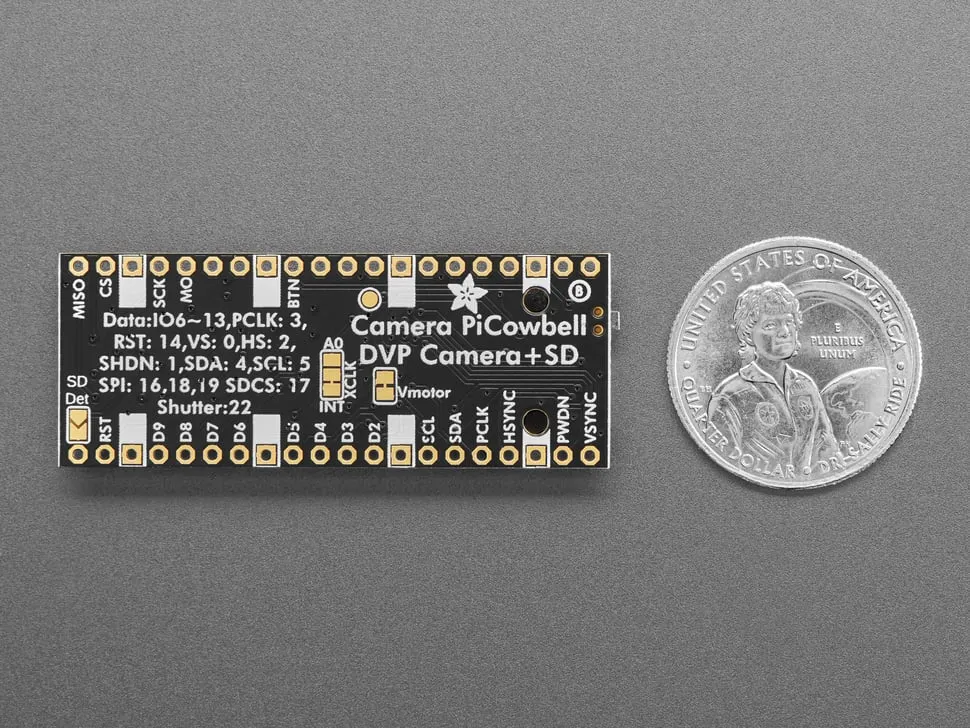
Camera PiCowbell Features:
-
Interface for OV5640 Camera module
VSync: GPIO 0
Power Down: GPIO 1
HSync: GPIO 2
Pixel Clock: GPIO 3
SDA/SCL: GPIO 4 and GPIO 5
8-bit Digital: GPIO6 through GPIO 13
Reset: GPIO 14
VMotor connected to 3.3V for auto-focus modules -
Micro SD Card:
SPI on GPIO 16, GPIO 18 and GPIO 19
Chip select on GPIO 17
Optional SD Detect on GPIO 15 - Shutter button on GPIO 22
- Reset button
- 16 MHz 'XClock' generated by onboard oscillator
- Stemma QT port for I2C on GPIO 4 / 5
Note that to use the auto-focusing capability, you need to load a new firmware binary over I2C. The autofocus system is controlled with I2C commands to begin an auto-focus procedure and determine that focus is complete. Otherwise, the camera looks just like any other OV5640 sensor.
Each order comes with an assembled PCB, camera sensor, and two pieces of 20-pin pin header. You will need to solder in the header yourself, but it's a quick task.
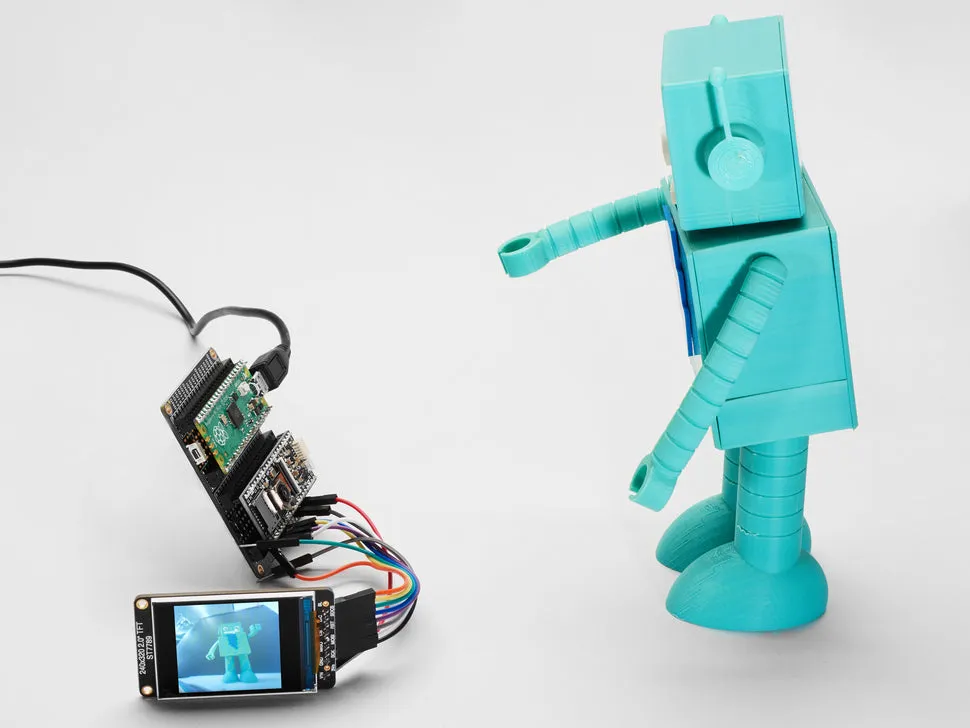
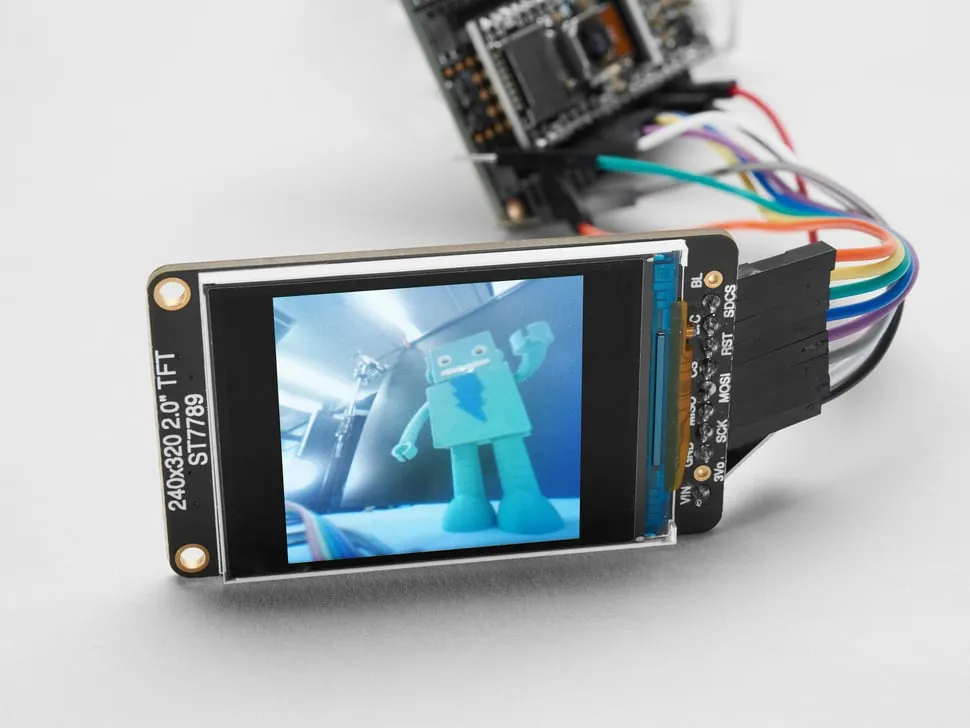
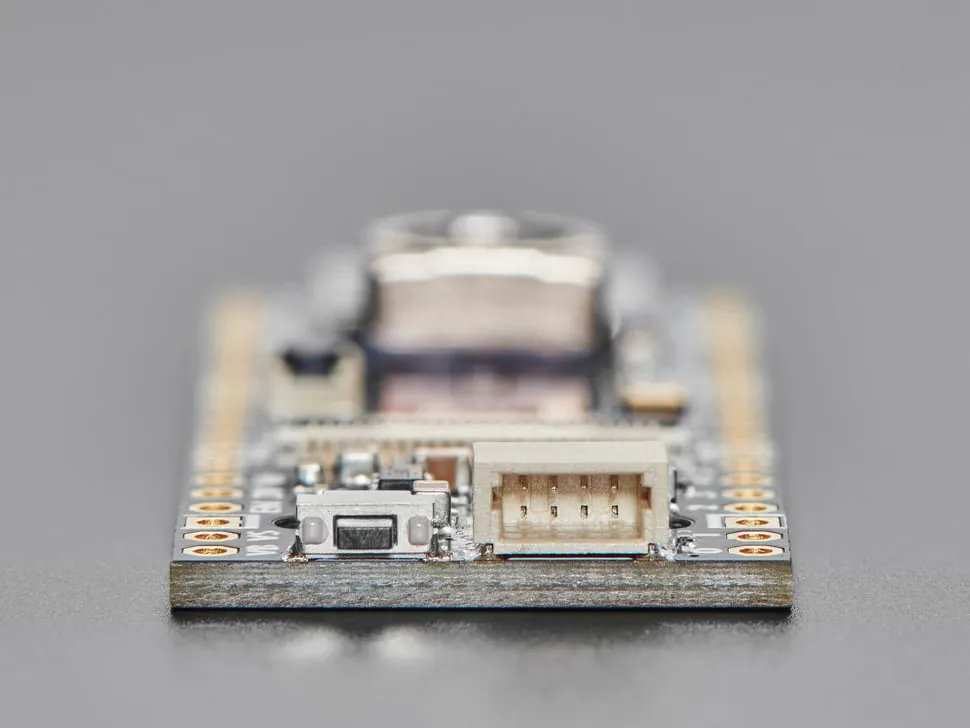
Since this board has the camera pointing 'up', it's best to use our . Or you can 'stack' the camera 'bell on top, best when you don't need easy access to the BOOT loading button.
Or, for a compact package, you can...
- if you want to be able to plug into a breadboard or other accessory with sockets. Solder these onto the Pico so that the camera is on top.
- if you want to plug directly in and have a nice solid connection that doesn't have any poking-out-bits. Ditto, solder these into the Pico and plug the camera on top.
Technical Details
Product Dimensions: 53.0mm x 20.3mm x 6.3mm / 2.1" x 0.8" x 0.2"
Product Weight: 4.9g / 0.2oz


![Hawkeye DepthTrax In-Dash Digital Depth Temp Gauge - Transom Mount [DT2BX-TM]](https://www.precisionhea.shop/image/hawkeye-depthtrax-in-dash-digital-depth-temp-gauge-transom-mount-dt2bx-tm_B0d5FB_285x.webp "Hawkeye DepthTrax In-Dash Digital Depth Temp Gauge - Transom Mount [DT2BX-TM]")
